Most homeowners never check their water pressure until something goes wrong — a trickling faucet, a washing machine that takes forever to fill, or pipes that bang and groan without explanation. Water pressure that sits outside the normal range causes real damage over time, from worn-out fixtures to accelerated pipe corrosion.
A standard water pressure gauge costs under $15 at any hardware store and takes less than five minutes to use. The reading you get tells you whether your system is working correctly, whether your pressure regulator is doing its job, and whether low flow problems are a plumbing issue or a pressure issue. This article walks through the full process, from what you need to what your numbers mean.
What You Need Before You Start
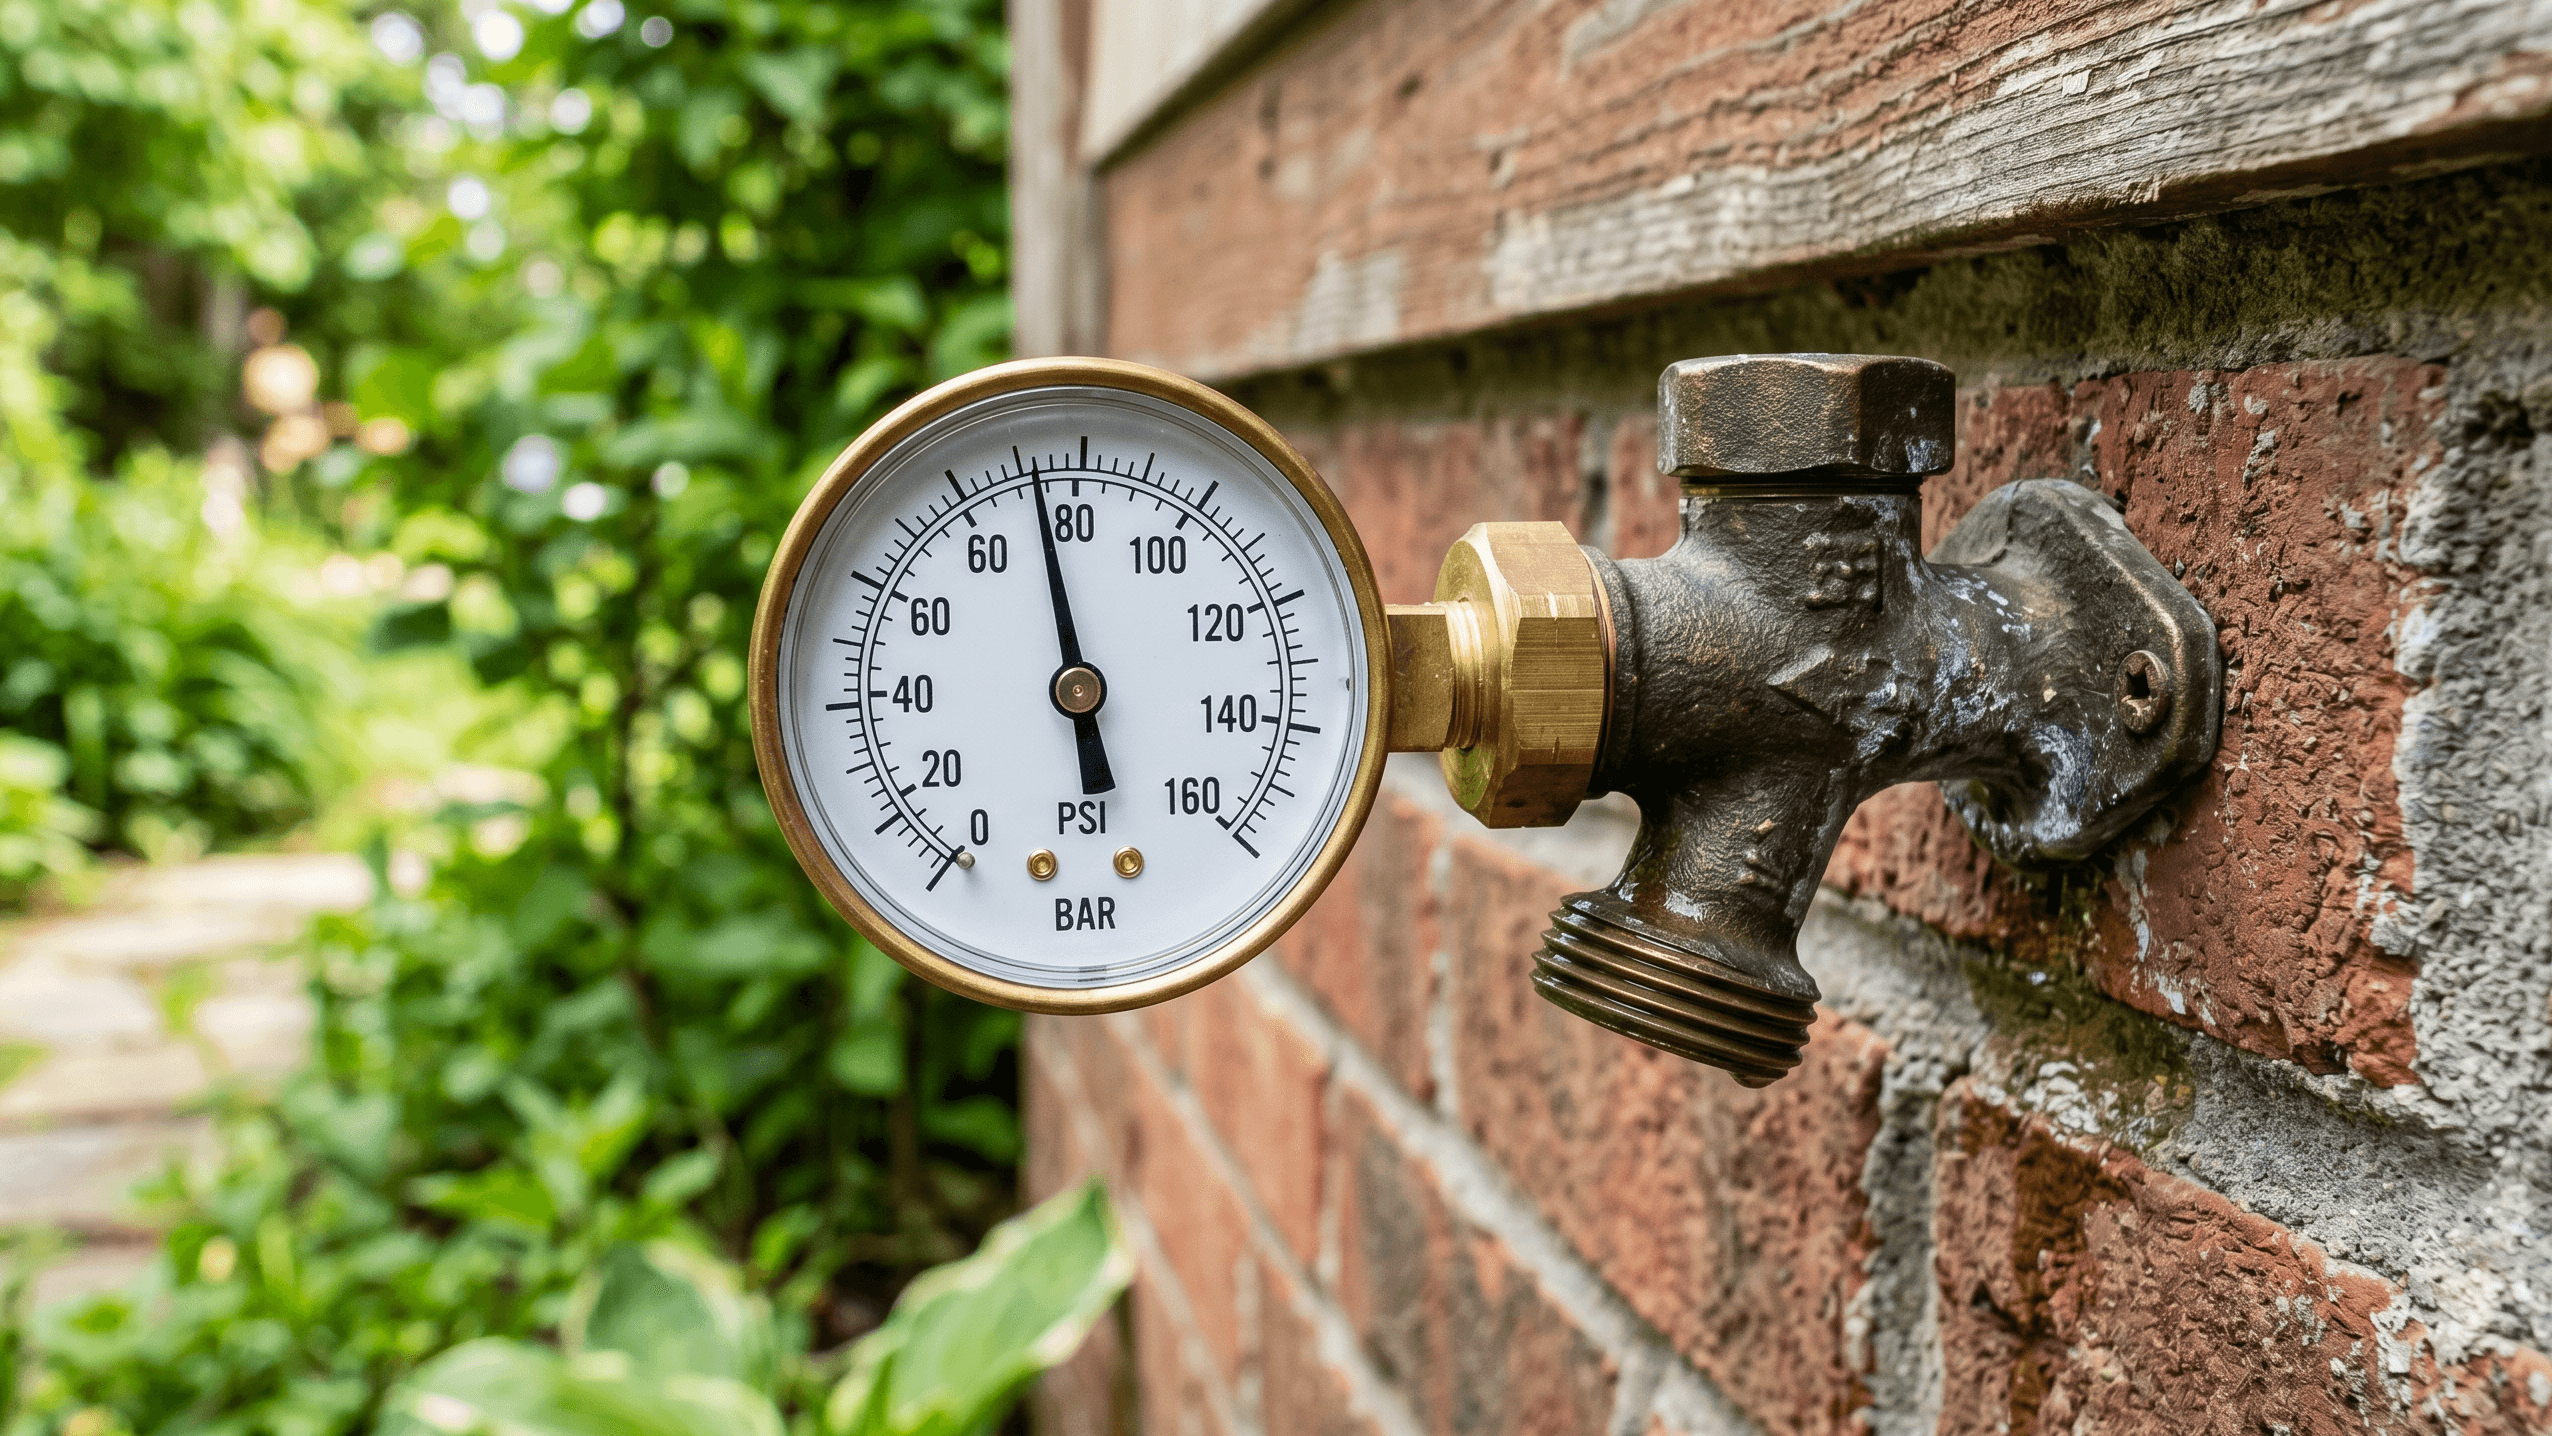
Testing home water pressure requires only one tool: a water pressure gauge with a standard hose thread fitting (3/4-inch). These are sold at hardware stores, home improvement centers, and online retailers. Look for a gauge with a range of 0–200 PSI, which covers all typical residential pressure ranges.
No special skills or tools are needed. The gauge screws directly onto an outdoor hose bib or washing machine supply valve — no cutting, soldering, or plumbing experience required.
One condition matters for an accurate reading: no water should be running anywhere in the home during the test. Running a dishwasher, flushing a toilet, or using a shower will drop the pressure reading and give you a false result.
The 7 Steps to Test Your Home Water Pressure
Step 1: Choose the right test point
Use an outdoor hose bib (spigot) located close to where the main water supply line enters the home. This gives you a reading closest to the actual supply pressure before it travels through your interior pipes. A washing machine cold-water supply valve is a reliable alternative if no outdoor spigot is accessible.
Avoid garden hoses or fixtures located far from the main line — the reading will reflect pressure losses caused by pipe length and fittings, not your actual supply pressure.
Step 2: Turn off all water in the home
Every faucet, toilet fill valve, appliance, and irrigation zone must be off. Even a running refrigerator ice maker can affect the reading. Walk through the house and confirm nothing is running before you take the measurement.
Step 3: Remove any attached hoses or accessories
Detach any garden hose or attachment from the outdoor spigot. A connected hose adds flow resistance that can artificially reduce the pressure reading. The gauge needs to thread directly onto the bare spigot.
Step 4: Attach the pressure gauge
Hand-thread the gauge clockwise onto the spigot or supply valve. Tighten snugly by hand — avoid using a wrench, which can crack the fitting or damage the gauge housing. Most gauges have a rubber washer inside the fitting that creates a watertight seal without extra torque.
Step 5: Turn on the valve fully
Open the spigot or supply valve completely. A partial opening creates a restriction that lowers the pressure reading. Turn it fully counterclockwise until it stops.
Step 6: Read the gauge
The needle will swing up and settle on a number within a second or two. Read the PSI (pounds per square inch) value where the needle rests steadily. Most gauges have both a live needle and a red memory needle — the red one holds the peak reading even after you close the valve, which is useful if the needle moves slightly.
Take note of the number. If the needle fluctuates significantly rather than settling, this itself is useful diagnostic information (see the interpretation section below).
Step 7: Close the valve and remove the gauge
Turn the spigot clockwise to close it fully. Once closed, unscrew the gauge by hand. Some residual water may drip from the fitting — this is normal. Dry the gauge and store it for future testing.
What Your Reading Means
The EPA and most municipal water authorities recommend residential water pressure between 40 and 80 PSI, with 60 PSI generally considered the optimal middle point. The International Plumbing Code sets the maximum incoming pressure at 80 PSI for residential systems.
| PSI Range | Status | What It Means |
|---|---|---|
| Below 40 PSI | Low | Fixtures underperform; possible supply or regulator issue |
| 40–60 PSI | Normal | Ideal range for most homes |
| 60–80 PSI | Acceptable | Within safe limits; monitor over time |
| Above 80 PSI | High | Stresses pipes and fixtures; PRV adjustment needed |
| Above 100 PSI | Dangerously High | Risk of pipe failure and appliance damage |
If your pressure reads below 40 PSI, the problem may be as simple as a clogged aerator or partially closed shutoff valve. A deeper look at common causes of low water pressure can help you narrow down the source quickly.
If you’re seeing normal pressure at the spigot but still experiencing weak flow at specific fixtures, the issue is likely localized — mineral buildup in aerators, a clogged faucet aerator, or a partially closed fixture shutoff valve. Those problems respond differently than a whole-house pressure issue.
When and How Often to Test
Test your home water pressure at least once a year as routine maintenance. Other triggers that warrant an immediate test include:
- Noticeable change in flow at multiple fixtures at once
- Pipes that make banging or hammering sounds when water stops (water hammer, often caused by high pressure)
- Appliance issues — washing machines, dishwashers, or water heaters that perform poorly
- After any major plumbing work or meter replacement
- After moving into a new home
Seasonal pressure changes are also worth knowing about. Many municipal systems run at higher pressure during off-peak hours and lower pressure during morning demand spikes. If water pressure fluctuates throughout the day, testing at different times of day will reveal how wide that range is in your home.
What to Do Based on Your Results
If pressure is below 40 PSI: Check that the main shutoff valve is fully open. Test during off-peak hours (late evening) to rule out municipal supply issues. If pressure remains low regardless of time, have a plumber inspect for pipe restrictions, a failing pressure regulator, or a supply line problem. Homes on well systems should have the well pump and pressure tank inspected, as pressure problems there have different causes than municipal supply issues.
If pressure is between 40–80 PSI: No action needed. Document the reading and retest annually.
If pressure exceeds 80 PSI: Your home may have a pressure reducing valve (PRV) that is set too high, worn out, or missing entirely. A licensed plumber can adjust or replace the PRV. Running at high pressure accelerates wear on washing machine hoses, toilet fill valves, water heater components, and pipe joints — so acting on a high reading matters more than most homeowners realize.
One Common Testing Mistake
Leaving a garden hose connected during the test is the most common error that leads to an inaccurate reading. The hose adds measurable flow resistance, particularly if it’s long or narrow. In testing scenarios where this error was corrected, measured PSI increased by 5–12 points after the hose was removed — enough to misclassify borderline low pressure as normal.
The second most common mistake is testing while water is in use inside the home. A single toilet refilling after a flush can drop dynamic pressure by 10–15 PSI, giving a false low reading that sends homeowners chasing a non-existent pressure problem.
Pressure Testing and Water Quality
While a pressure gauge only tells you about flow force, your water pressure test can indirectly reveal other issues. Sudden pressure drops sometimes accompany changes in water clarity or taste — both of which can signal problems in the supply line or within your home’s pipes. If you’re also noticing that tap water tastes metallic or has an unusual odor alongside pressure changes, both issues are worth investigating together since aging or corroding pipes can contribute to each. Understanding common tap water contaminants may also be useful context if your pressure test coincides with any water quality concerns.
FAQs
What is a normal water pressure reading for a house?
Normal residential water pressure falls between 40 and 80 PSI. Most plumbing codes and appliance manufacturers design for this range. A reading of 50–60 PSI is widely considered optimal — high enough for good flow, low enough to avoid stressing pipes and fixtures.
Can I test water pressure without a gauge?
Not accurately. Some informal methods — like timing how long it takes to fill a bucket — can give a rough sense of flow rate, but flow rate and pressure are different measurements. A pressure gauge is the only reliable way to get a PSI reading. At under $15, it’s the most practical option for a definitive answer.
Why is my water pressure low only when the hot water is running?
Low pressure on hot water with normal cold pressure typically points to a restriction in the hot water system rather than the incoming supply. Common causes include sediment buildup inside the water heater tank, a partially closed shutoff valve at the heater, or corroded hot water pipes. This situation is covered in detail at why hot water pressure is low but cold is fine.
How do I know if I have a pressure reducing valve (PRV)?
A PRV is a bell-shaped valve typically located near the main water shutoff, often close to the water meter or where the supply line enters the house. Not all homes have one — they’re more common in areas where municipal pressure runs high. If your pressure test reads above 80 PSI, a licensed plumber can confirm whether a PRV is present, needs adjustment, or should be installed.
Does low water pressure affect water conservation efforts?
Indirectly, yes. Fixtures and appliances — particularly low-flow showerheads and water-efficient toilets — are designed to function correctly within the 40–80 PSI range. Very low pressure can make low-flow fixtures feel inadequate, which may discourage their use. If you’re working on saving water in your bathroom without remodeling or considering installing a low-flow showerhead, confirming adequate pressure beforehand ensures those fixtures will perform as intended.