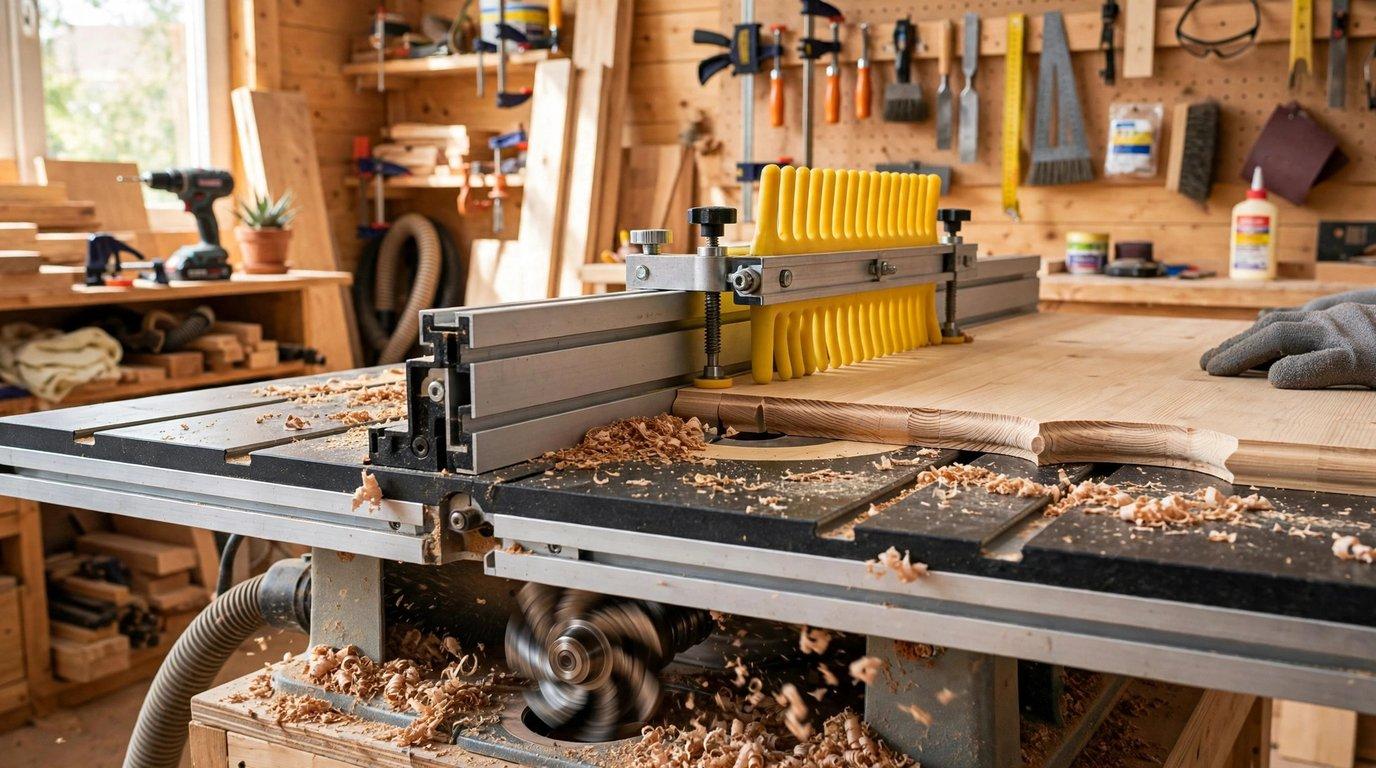
The short answer: A router table holds your router upside down beneath a flat tabletop, so the bit spins upward through a small opening. You set the bit height and the fence once, switch the router on, and slide your workpiece across the table and past the bit — always feeding from right to left — while the cutter shapes the edge or cuts the groove. Set it up carefully, take shallow passes, and it quickly becomes one of the most useful tools in your shop.
When I first stood in front of a router table, I treated it like something that might bite me. The bit screamed at twenty thousand revolutions per minute, the wood vibrated, and every woodworking forum seemed full of warnings. Then an older woodworker at the community shop walked me through a single roundover cut: bit height set with a scrap of wood as a gauge, fence locked, featherboard pressing the board down, one smooth pass from right to left. The edge came out glassy. Ten minutes of setup, ten seconds of cutting — and I understood why people say the router table is the heart of a small shop.
This guide is the walkthrough I wish I’d had. It covers what a router table does, every part you need to know, the safety habits that matter, the full setup sequence, feed direction, your first real cuts, bit speeds, and the mistakes that catch nearly every beginner. If you enjoy hands-on project guides, our sister publication 9bio.co.uk publishes practical how-tos in the same plain-English style.
IN THIS GUIDE
- What a Router Table Actually Does
- The Parts of a Router Table, Explained
- Safety Rules to Learn Before You Switch It On
- Setting Up Your Router Table, Step by Step
- Feed Direction: The One Rule You Can’t Afford to Get Wrong
- Your First Real Cut: Edge Profiling
- Cutting Grooves, Dadoes, and Rabbets
- Router Bit Speed Guide
- Mistakes Beginners Make (and How to Fix Them)
- Router Table vs. Handheld Router: Which Should You Use?
- Frequently Asked Questions
- Conclusion
What a Router Table Actually Does
A handheld router is a motor with a spinning cutter that you move over the wood. A router table flips that relationship: the router bolts underneath a flat table, the bit pokes up through an opening, and you move the wood over the bit instead. Your hands guide the workpiece while the cutter stays fixed in one place.
That one change makes an enormous difference. Because the bit doesn’t move, every pass is identical — which is exactly what you want when you’re shaping the edges of four table legs or cutting matching grooves in a dozen shelf boards. The fence gives you a straight reference edge, featherboards hold the stock firmly against the fence and table, and both of your hands stay well clear of the cutter. Small parts that would be terrifying to rout by hand become routine on the table.
Typical router table jobs include shaping decorative edges (roundovers, ogees, chamfers, coves), cutting grooves and dadoes for shelves and drawer bottoms, cutting rabbets for box joints and picture frames, flush-trimming laminate or template work, and even jointing a straight edge on a board when you don’t own a jointer. It won’t replace a table saw or a planer, but for edge work and small joinery it is hard to beat.
Practical tip: Think of the router table as a small, precise shaper rather than a “table version” of the handheld router. The mindset shift matters: on the table you control the wood, not the tool, so your setup — bit height, fence position, hold-downs — does most of the work before you ever switch the motor on.
The Parts of a Router Table, Explained
You don’t need to memorize part numbers, but you do need to know what each piece does, because setup is just adjusting these parts in the right order.
The table and mounting plate
The tabletop is a large, flat surface — usually laminated MDF, phenolic resin, or cast iron on better saws — with a removable mounting plate in the center. The router bolts to the underside of that plate. The plate must sit perfectly flush with the surrounding table: even a sixteenth of an inch of lip will catch your workpiece mid-pass and ruin the cut. Most plates have small leveling screws around the edge for exactly this adjustment.
The fence
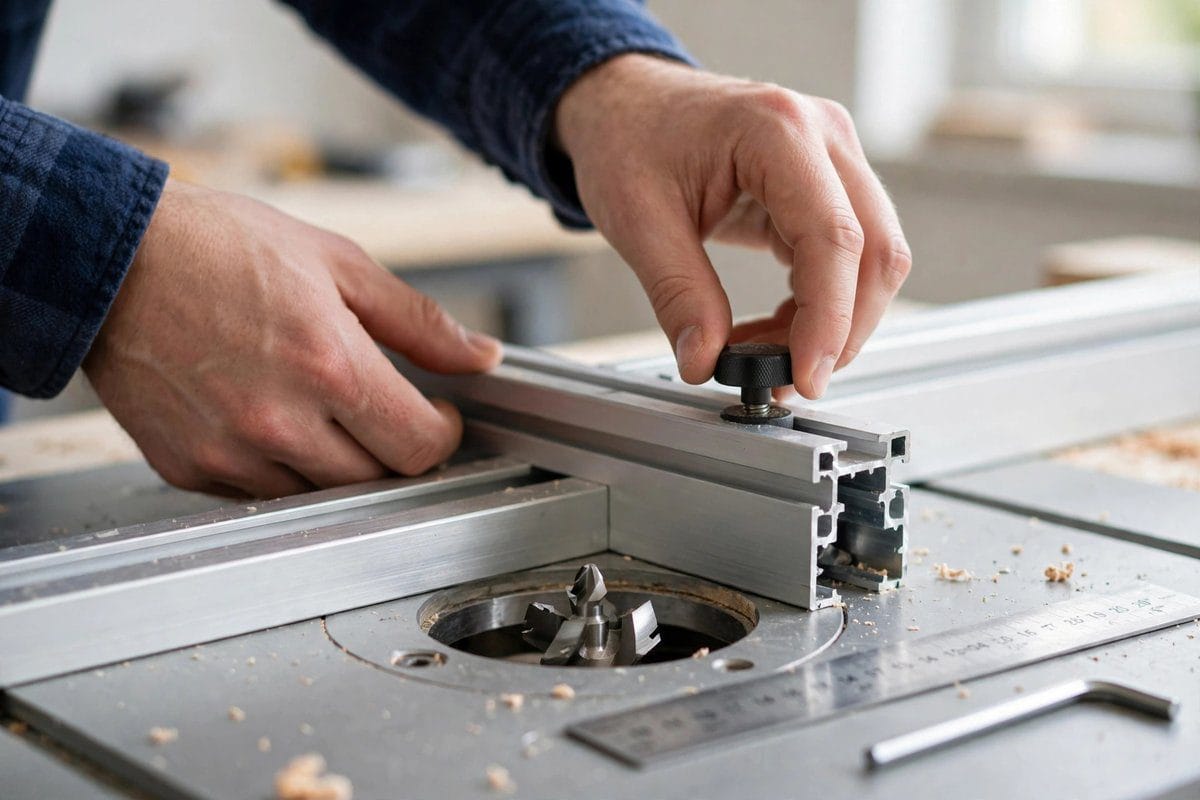
The fence is the straight guide that runs across the table behind the bit. You position it to control how much of the bit’s cutting edge is exposed and how far from the board’s edge the cut lands. A good fence locks down rock-solid, has an adjustable opening around the bit, and often includes a dust-collection port and T-slots for attaching featherboards or a sacrificial facing.
The bit and collet
The collet is the split-sleeve chuck on the router’s spindle that grips the bit’s shank. Bits come in 1/4-inch and 1/2-inch shank sizes; the 1/2-inch shank is stiffer and vibrates less, so use it whenever your router accepts it. Bit profiles have plain names that describe the shape they cut: straight bits cut grooves, roundover bits soften edges, ogee and cove bits cut decorative profiles, chamfer bits cut angled edges, rabbeting bits cut step-shaped notches, and flush-trim bits copy a template’s shape.
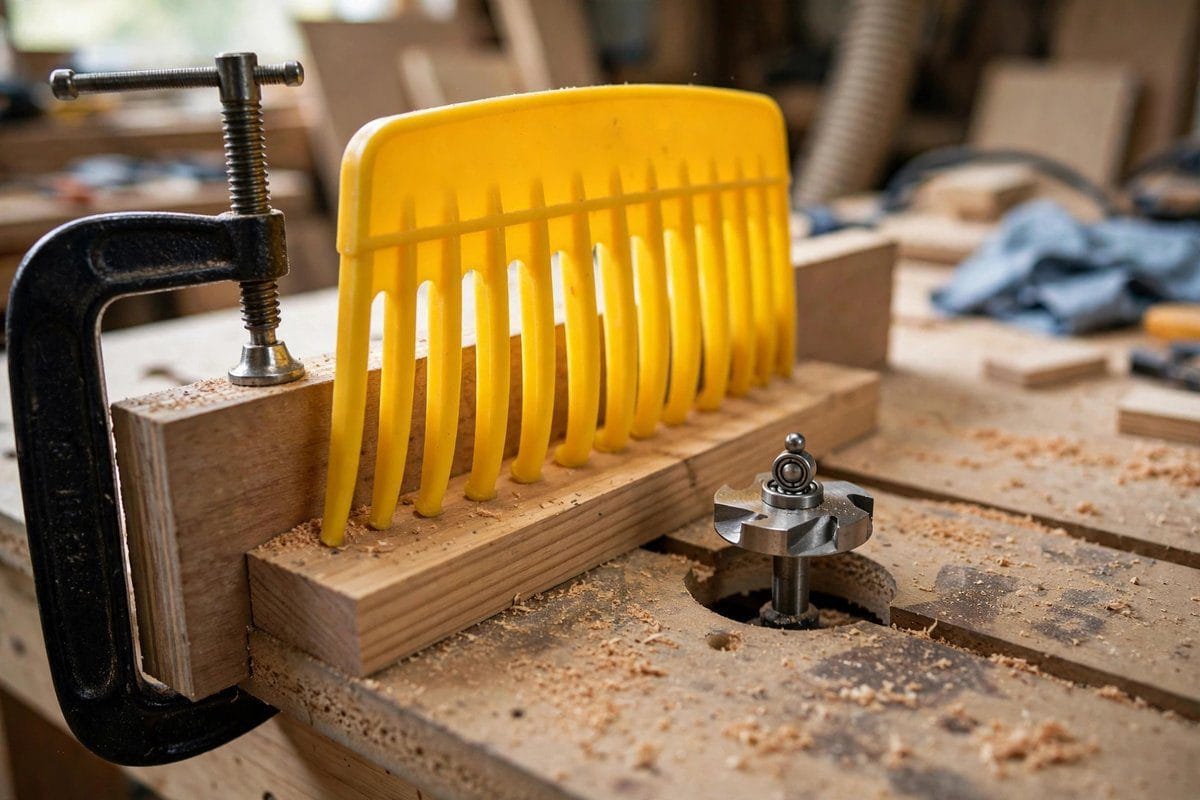
Featherboards
A featherboard is a block with a row of flexible angled “fingers” that you clamp to the fence or table. The fingers press the workpiece firmly against the fence (or down onto the table) while letting it slide forward. This is the accessory that keeps your hands away from the bit and your cuts consistent. If you buy one accessory for a new router table, make it a pair of featherboards.
Miter slot, starting pin, and switch
The miter slot is the groove running front-to-back in the table; it accepts a miter gauge for guiding crosscuts and a starting pin — a small metal post that goes in the table near the bit. The starting pin gives you a safe pivot point when doing freehand curve work with a bearing-guided bit, where the fence isn’t used. The switch should be a large paddle you can slap off with your knee or hip without looking down; never operate a router table whose switch you have to hunt for.
Safety Rules to Learn Before You Switch It On
A router table demands respect, not fear. Every rule below exists because someone learned it the hard way, and together they make the tool about as risky as a table saw — which is to say, perfectly manageable with good habits.
Protect yourself first
Wear safety glasses or a face shield every time the router runs; a router throws chips at remarkable speed. Wear hearing protection — routers are loud enough to damage hearing over time. Wear a dust mask or respirator, because fine wood dust is a genuine respiratory irritant, and connect dust collection if your table has a port. Tie back long hair, roll up sleeves, and remove rings, watches, bracelets, and anything dangling. Interestingly, most safety guides advise against wearing loose gloves near the bit, since a glove can snag and pull your hand in — bare hands with push blocks are the standard practice.
Rules for the tool
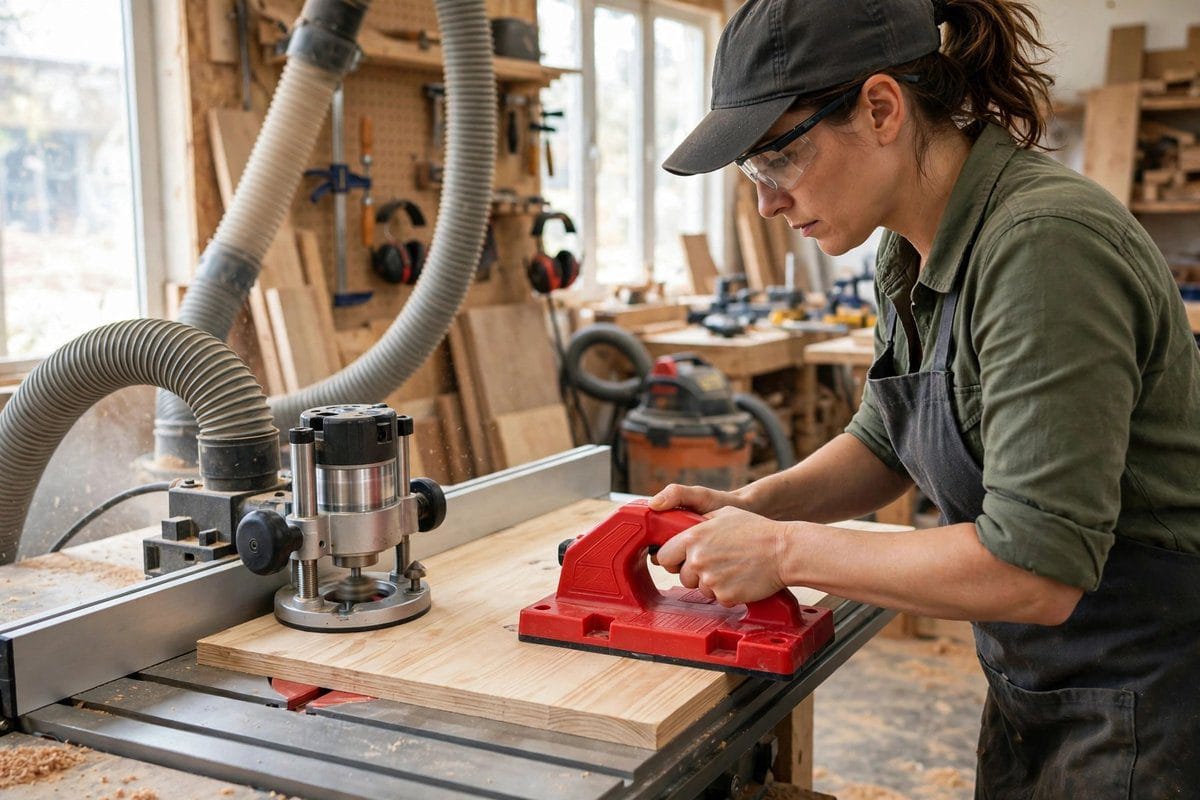
Unplug the router (or lock out the switch) whenever you change bits or make adjustments under the table. Let the bit reach full speed before the wood touches it, and let it spin down fully before you reach near it. Never start the router with the bit touching the workpiece. Keep the work area clear of offcuts and clutter, and always do a dry run — sliding the board through with the power off — to check that your hands, the featherboards, and the fence all clear the bit path comfortably.
Rules for the cut
Always feed against the bit’s rotation (more on this below), take shallow passes instead of one deep hogging cut, and use push blocks or push sticks whenever your fingers would come within a few inches of the bit. If a cut feels wrong — the motor strains, the wood chatters, something smells like burning — stop, switch off, and reassess. The wood isn’t going anywhere.
Practical tip: Build the habit of the “power-off pass.” Before every new setup, unplug the router and push your workpiece through the full cut by hand. You’ll discover clearance problems, awkward hand positions, and fence mistakes while the bit is harmlessly still — which is exactly when you want to find them.
Setting Up Your Router Table, Step by Step
Good results come from setup, not from heroics during the cut. Work through these steps in order and the cutting itself becomes almost boring — which is precisely the goal.
Step 1: Choose and install the bit
Pick the bit profile your project needs and inspect it: the cutting edges should be sharp and free of pitch buildup or nicks. With the router unplugged, slide the shank into the collet until it seats, then pull it back out about a sixteenth of an inch so it isn’t bottomed out, and tighten the collet firmly with the wrenches. A bit that isn’t fully gripped can creep downward mid-cut or, worse, work loose. Seat plenty of shank in the collet — most of the shank should be inside, not dangling out.
Step 2: Set the bit height
Bit height controls how deep the profile cuts or how tall the groove is. Raise or lower the router (most tables have a crank or lift mechanism) until the bit sits at the right height, then lock it. The beginner-friendly way to dial this in: set it slightly low, make a test cut in scrap, check the result, and sneak up on the final height in small increments. Sneaking up beats overshooting every time, because you can’t put wood back.
Step 3: Position the fence
For edge work, the fence controls how much of the bit engages the wood. Start with the fence nearly touching the bit’s cutting edge and nudge it back in small steps between test cuts. For grooves and dadoes, the fence sets the distance from the board’s edge to the cut — measure from the fence face to the far edge of the bit, lock the fence, and double-check with a ruler. Make sure the fence is parallel to the miter slot and locked tight enough that it cannot drift mid-cut.
Step 4: Set the router speed
Big bits spin slower than small bits. A large panel-raising bit at full speed is a genuinely dangerous combination of mass and momentum, while a tiny roundover at low speed will burn and chatter. Set the speed dial to suit the bit diameter (see the speed guide below), and when in doubt, start slower and listen to the cut.
Step 5: Add hold-downs and do a test cut
Clamp a featherboard to the fence ahead of the bit so it presses the board against the fence, and optionally a second one pressing down on the table. Then cut a piece of scrap — ideally the same species and thickness as your project wood. Check the profile, the depth, the surface quality, and the fit if it’s a joint. Adjust once, cut again. Only when the scrap looks right do you touch your real workpiece.
Practical tip: Keep a labeled box of test scraps near the router table. A two-minute test cut in pine scrap has saved more projects than any fancy accessory, and it costs nothing.
Feed Direction: The One Rule You Can’t Afford to Get Wrong
The short answer: On a router table, feed the workpiece from right to left when you’re working against the fence. That’s it. Memorize it.
Here’s why it matters. The bit spins in a fixed direction, and you must always feed the wood against that rotation — so the cutter bites into the oncoming wood rather than grabbing it. On a router table, feeding against the rotation means moving the board from right to left along the fence. The cutting action then pushes the workpiece back against the fence and down onto the table, which is exactly where you want it: stable, controlled, and predictable.
Feed the wrong way — left to right — and you’re making what’s called a climb cut. The bit’s rotation grabs the wood and hurls it in the feed direction, often faster than you can react. The board can shoot across the shop, and your hands can get dragged toward the bit. Climb cuts have legitimate uses in expert hands (for example, taming tearout on tricky end grain), but they are an advanced technique with very light cuts, never a beginner move.
There’s one common exception to the right-to-left rule: freehand work with a bearing-guided bit and no fence, such as rounding the edge of a curved tabletop. There, the workpiece stays between you and the bit, and you feed so the bit’s rotation pushes the work away from you in a controlled way — which works out to feeding left to right on the near edge. When in doubt, do the power-off pass and think about which way the bit would throw the wood; feed the opposite way.
Your First Real Cut: Edge Profiling
Edge profiling — rounding over, chamfering, or shaping a board’s edge with a decorative bit — is the perfect first router table project. It’s forgiving, instantly satisfying, and it teaches every fundamental at once.
Start with a roundover bit in a piece of straight-grained softwood or a hardwood offcut. Install the bit, set its height so the roundover’s curve meets the board’s faces cleanly (a test cut shows you immediately), and set the fence so only the bearing or the profile’s edge kisses the wood. Add a featherboard pressing the board to the fence just ahead of the bit.
Now the cut itself. Stand comfortably to the side, never directly behind the bit’s exit path. Switch on, let the bit reach full speed, and ease the board’s leading end into the bit with a push block. Keep steady downward and inward pressure — against the table and against the fence — and move at a smooth, unhurried pace from right to left. Don’t stop mid-cut if you can avoid it; pausing lets the spinning bit burn a dark spot into the wood. Follow through until the board clears the bit, then switch off.
If the profile came out shallow, raise the bit a hair or nudge the fence back and make another pass. Two light passes beat one aggressive pass for both safety and surface quality. When the edge feels silky and the curve is even, you’ve got it — and you’ve just learned the core motion behind most router table work.
Practical tip: Listen to the router. A happy cut sounds like a steady hum with an even chip stream. A labored, dropping pitch means you’re feeding too fast or cutting too deep; a high whine with dust instead of chips and a burning smell means you’re feeding too slowly or the bit is dull.
Cutting Grooves, Dadoes, and Rabbets
Once edge profiling feels natural, grooves and dadoes open up real joinery: shelves that sit in slots instead of on brackets, drawer bottoms captured in grooves, cabinet backs set into rabbets. The setup is the same idea with the fence doing more of the work.
For a groove or dado (a channel cut across or along the grain), install a straight bit whose diameter matches the channel width you want — or slightly narrower, widening with a second pass. Set the bit height to the channel depth, then position the fence so the distance from the fence face to the far side of the bit equals the distance from the board’s reference edge to the far side of the channel. Lock everything, featherboard the board against the fence, test in scrap, then cut right to left in one or more passes.
If the channel must be wider than your bit, cut the first pass, then move the fence away from the bit by the remaining width and cut again. Always move the fence so the cut stays on the correct side of the bit — the side that keeps the workpiece pressed against the fence by the cutting action, not the side that would pull it away. When widening, shift the fence outward (away from the bit), never inward past the safe side.
A rabbet — an L-shaped step along a board’s edge — is just a wide, shallow groove at the edge. Use a rabbeting bit with a bearing, or a straight bit with the fence set to expose the right width. Because you’re removing the board’s edge entirely on one side, support the offcut side so it doesn’t tip into the bit opening at the end of the pass.
Depth discipline matters most here. A shelf dado doesn’t need to be heroic: cut in two or three passes, removing a quarter inch or less of material per pass, and the walls of the groove come out clean instead of chipped and burned.
Router Bit Speed Guide
The short answer: Small bits spin fast, big bits spin slow. Match the speed to the bit diameter and you’ll get cleaner cuts with far less vibration and risk.
Router bits are balanced for a certain rim speed. Spin a big-diameter bit at full tilt and the outside edge travels alarmingly fast, which multiplies vibration and the energy of anything that goes wrong. Spin a tiny bit too slowly and it rubs instead of cutting, leaving burns. Variable-speed routers typically adjust between about 8,000 and 25,000 RPM — use the dial deliberately.
| Bit Diameter | Typical Speed Setting | What It’s For |
|---|---|---|
| Up to 1 inch | 22,000–24,000 RPM | Roundovers, chamfers, small straight bits, flush-trim bits |
| 1 to 2 inches | Around 18,000 RPM | Ogee and cove profiles, medium straight bits, rabbeting bits |
| 2 to 2-1/2 inches | 12,000–16,000 RPM | Large raised-panel and stile-and-rail bits, big roundovers |
| Over 2-1/2 inches | 8,000–12,000 RPM | Panel-raising bits and other large-diameter cutters |
Treat this as a starting point, not gospel: always check the speed recommendation printed on the bit’s packaging or the manufacturer’s guidance, and start at the slower end if you’re unsure. Denser hardwoods and deeper cuts also reward slightly slower speeds and a steadier feed.
Practical tip: If your router has marked speed detents (1 through 5 or similar), write the matching RPM range on a piece of masking tape stuck to the table. Future you will thank present you.
Mistakes Beginners Make (and How to Fix Them)
Nearly everyone makes the same handful of errors when starting out. Knowing them in advance turns a ruined board into a five-minute correction.
Burn marks on the cut
Dark scorch lines mean the bit lingered too long in one spot. The usual causes are a dull bit, feeding too slowly, or trying to remove too much material in one pass. Fix it by sharpening or replacing the bit, keeping the feed moving steadily, and splitting deep cuts into multiple shallow passes. A light pass with the same bit often cleans up a burned edge.
Tearout and chipping
Torn grain at the end of a cut happens when the cutter exits unsupported wood fibers. Climb-cutting the last inch of an end-grain pass, adding a sacrificial backing board behind the workpiece, or scoring the cut line with a knife first all help. Routing “downhill” with the grain — so the cutter meets the grain at a shearing angle — also reduces tearout on figured wood.
Taking too much in one pass
The classic beginner error: cranking the bit up to full profile depth and muscling the board through. The motor strains, the cut chatters, and the result looks chewed. The fix is the quarter-inch rule — remove a quarter inch or less of material per pass, sneaking up on the final depth over two or three passes. It’s faster in the end because you skip the sanding.
Inconsistent pressure against the fence
If the board drifts away from the fence mid-pass, the cut wanders with it. Featherboards exist precisely to solve this: one pressing the stock against the fence ahead of the bit keeps every pass identical. Keep your push block pressing inward as well as forward, not just shoving from behind.
Skipping the test cut
Every setup deserves a scrap test. Wood species, moisture, and grain all change how a cut behaves, and a thirty-second test reveals bit-height errors and fence mistakes before they touch your project. The woodworkers with the cleanest results are usually just the ones who test the most.
Router Table vs. Handheld Router: Which Should You Use?
Neither tool replaces the other — they divide the work by what’s moving. Use the table when the workpiece is the moving part and the cut repeats; use the handheld router when the tool must travel to the work.
| Factor | Router Table Wins | Handheld Router Wins |
|---|---|---|
| Small or narrow parts | Far safer — the bit is fixed and both hands guide the wood | Risky — small parts are hard to clamp and control |
| Repeated identical cuts | Set once, repeat all day with perfect consistency | Each pass must be re-guided; slower and less consistent |
| Large panels and installed work | Impractical — you can’t feed a countertop through a table | The tool goes to the work: hinge mortises, inlays, edge work on assemblies |
Most woodworkers end up owning both and reaching for the table for anything under a couple of feet long. If you’re buying your first setup and mostly build boxes, shelves, and small furniture, the table will earn its floor space quickly.
Frequently Asked Questions
Can I use any router in a router table?
Most fixed-base and plunge routers can be table-mounted if the table’s mounting plate matches the router’s base pattern — many plates come pre-drilled for popular models or with a universal drilling template. What matters more is power and speed control: a mid-size or larger router (around 2 horsepower and up) with variable speed handles table work far better than a small trim router, which is really designed for handheld light-duty tasks.
Which way do I feed wood on a router table?
Feed from right to left when working against the fence. This feeds the wood against the bit’s rotation, so the cutter pushes the workpiece into the fence and down onto the table — stable and controlled. Feeding left to right is a climb cut: the bit can grab the board and throw it, so leave that technique alone until you have significant experience.
How deep can I cut in one pass?
As a rule of thumb, remove a quarter inch or less of material per pass, and less than that in hardwoods or with large-diameter bits. Deep profiles like raised panels may take three or four passes. Shallow passes cut cleaner, strain the motor less, and are dramatically safer.
Why is my router table burning the wood?
Burning almost always comes down to three things: a dull bit, a feed rate that’s too slow, or too deep a cut. Sharpen or replace the bit, keep the workpiece moving at a steady pace without pausing mid-cut, and split the cut into lighter passes. Resin buildup on the bit also causes burning, so clean bits with an appropriate pitch remover when they look gummy.
Do I really need featherboards?
You can make cuts without them, but they’re the single biggest upgrade for both safety and cut quality on a router table. They hold the workpiece tight to the fence and table with constant pressure — something your hands can’t do as evenly — and they keep your fingers away from the bit. A pair costs far less than a single ruined project.
What is a starting pin used for?
The starting pin is a small post that fits into the table near the bit. When you’re doing freehand shaping with a bearing-guided bit and no fence — like rounding the edge of a curved plaque — you brace the workpiece against the pin to start the cut safely, then pivot the wood into the bearing. It gives you a controlled entry instead of freehanding the wood into a spinning cutter.
Conclusion
Learning how to use a router table comes down to a short list of habits: install the bit securely, set the height and fence with test cuts, match the speed to the bit, feed right to left against the fence, take shallow passes, and keep your hands behind push blocks and featherboards. None of it is complicated — it’s just deliberate. Work through one edge profile and one groove in scrap wood this weekend, and the machine that looked intimidating will feel like the most predictable tool in your shop. The cuts will be cleaner, the joints will fit better, and your projects will start looking like someone who knew what they were doing made them — because now, you do.
Read Also: Knee Pain Relief (2026 Guide): Practical Ways to Ease Achy Knees