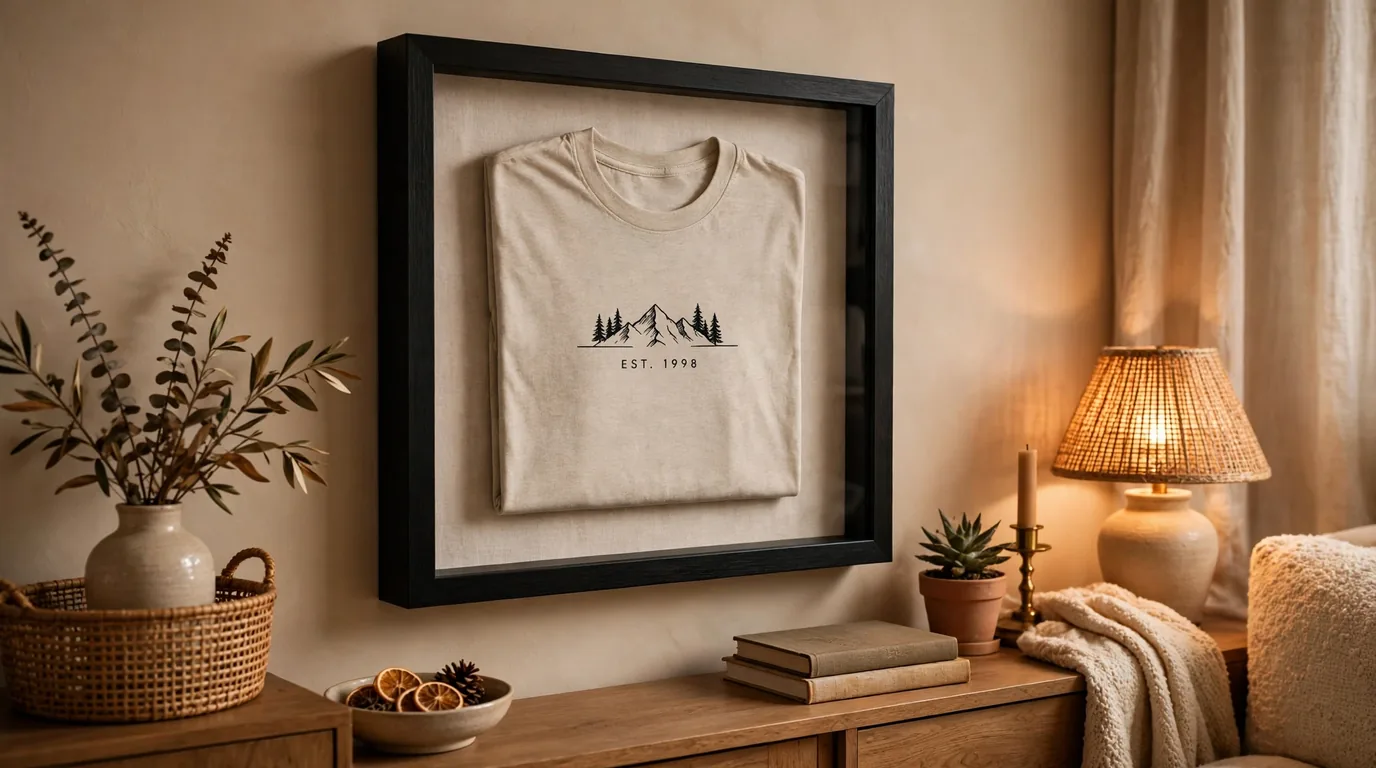
The short answer: a t frame shirt display is a t-shirt mounted inside a deep frame — usually a shadow box or an acrylic t-shirt frame — so it hangs on the wall like artwork instead of sitting folded in a drawer. The best method for most people is the no-cut approach: fold the shirt over a cardboard or foam insert, secure it from the back, and mount it in a frame with UV-protective glazing. It takes about an hour, costs very little, and the shirt stays fully intact.
Almost everyone owns at least one t-shirt that deserves better than a drawer. The concert tee from a show you will never forget. The jersey from a championship season. A shirt signed by someone you admire, or one that belonged to a person you miss. These shirts stop being clothing and start being memories — and memories look better on the wall than balled up on a shelf.
Framing a t-shirt sounds intimidating because fabric is not paper: it wrinkles, it stretches, it fades, and it is three-dimensional in a way that fights flat frames. But the techniques are straightforward once you understand the three decisions that matter — which frame, how to mount the shirt, and how to protect it. Get those right and the result looks like something from a professional framing shop.
In This Guide
What a T Frame Shirt Display Actually Is
When people say “t frame shirt display,” they are usually describing one of two things: a t-shirt displayed in a frame, or specifically a t-shirt in a T-shaped or deep-set frame arrangement. In practice, the phrase covers any wall-mounted display where a t-shirt is the centerpiece inside a frame — the classic version being a shadow box frame deep enough to hold folded fabric without crushing it.
The reason ordinary picture frames do not work is depth. A standard frame holds its contents pressed flat between glass and backing board. A t-shirt, even folded, has bulk — seams, a collar, layered fabric. Press it flat under glass and you get a wrinkled, compressed mess, and the fabric touching the glass traps moisture that can lead to mildew and staining over time. A proper t-shirt display frame solves this with depth: the shirt sits on a backing board with air space between the fabric and the glazing.
That depth is the whole difference between “shirt stuffed in a frame” and a display that looks intentional. Everything else — the frame style, the mounting method, the background — is refinement on top of that one structural requirement.
Choosing the Right Frame Type
Three frame styles dominate t-shirt displays, and each suits a slightly different goal. Understanding the trade-offs before you buy saves you from the most common frustration in this project: a frame that is almost, but not quite, right.
| Frame Type | Best For | Watch Out For |
|---|---|---|
| Shadow box frame | Most t-shirt displays — deep enough for folded fabric, widely available, many with UV-protective glass options | Depth varies; confirm the interior depth fits your folded shirt before buying |
| Acrylic t-shirt frame | A clean, modern look — the shirt appears to float; often comes with a shaped insert that holds the shirt’s form | Acrylic scratches more easily than glass; keep cleaning cloths soft and non-abrasive |
| Deep-set standard frame | Budget displays — a regular frame with enough depth, or a DIY-built deep frame for custom sizes | May need a DIY spacer so the fabric never touches the glass; measure carefully |
For a first project, a ready-made shadow box is the easiest path. They are sold at craft stores and online in sizes that fit folded t-shirts, many include a fabric-covered backing board, and the better ones offer UV-protective glass — which matters more than most people realize, as covered in the protection section below.
Acrylic t-shirt frames — sometimes sold as “t-shirt display cases” — take a different approach. Instead of a traditional frame with a backing board, they typically use a clear acrylic box with a shaped insert inside. You pull the shirt over the insert the way it would sit on a torso, which gives the display a filled-out, three-dimensional look. The effect is striking for jerseys and shirts with bold front graphics, though the all-clear construction shows dust more readily and needs gentle cleaning.
Practical tip: if the shirt has printing on both the front and back that you want to show, plan for two frames hung side by side rather than trying to squeeze both sides into one. It is a common desire and a common disappointment — one frame shows one side well, and two frames tell the whole story.
Getting the Size Right
Sizing is where most t frame shirt display projects go wrong, and the mistake is almost always the same: buying the frame first and discovering the shirt does not fit the way you imagined. Measure the shirt before you shop.
Lay the shirt flat, smooth out the wrinkles, and decide which part of the design you want visible — usually the chest graphic. Measure the width and height of that visible area, then add a few inches of margin on each side. That margin is not wasted space; it is what makes the display look like art instead of a shirt crammed into a box. A good rule of thumb is at least two to three inches of background visible around the design on every side.
For the no-cut method described below, you will fold the sleeves and excess fabric behind an insert, so the frame only needs to fit the folded footprint — roughly the width of the chest and the length from collar to hem. For the traditional cut method, the frame needs to fit the cut panel plus its mounting board. Either way, write the measurements down and bring them when you shop, whether that is in a store aisle or an online listing.
Depth matters as much as width and height. A folded t-shirt on an insert is typically one to two inches thick at the collar and seams. Check the frame’s interior depth specification — not the outside dimensions — and make sure it clears your folded shirt with a little room to spare. If the shirt presses against the glazing, you lose the air gap that prevents moisture problems.
The No-Cut Method: Mounting Without Damaging the Shirt
This is the method to use for any shirt you might ever want to wear again — or any shirt with sentimental or collectible value. Nothing gets cut, nothing gets glued to the visible fabric, and the whole thing is reversible. Here is the process, step by step.
1. Prepare the shirt. Wash it if it needs it, then iron or steam out the wrinkles. A wrinkled shirt in a frame looks like a wrinkled shirt in a frame — there is no hiding it behind glass. Run a lint roller over the front to pick up dust and fibers. Handle a signed shirt by the edges to avoid smudging the signature.
2. Prepare the insert. Cut a piece of sturdy cardboard or foam core to roughly the size of the frame’s interior — slightly smaller so it fits comfortably. If you want a finished look, wrap it in a neutral fabric like black or white cotton, or felt, pulling the fabric taut and securing it on the back with tape. The fabric background is what will show around the shirt, so choose a color that complements the design rather than competing with it.
3. Position the shirt. Lay the wrapped insert face-down on a clean table and place the shirt face-down over it, centering the design where you want it. Fold the sleeves in neatly, then fold the sides and bottom hem around to the back of the insert. Take your time here — the arrangement you set now is the arrangement you will see on the wall for years. Step back and look at it from a few feet away before you secure anything.
4. Secure from the back. On the back of the insert, hold the folded fabric in place with archival-safe tape, stainless steel framing pins pushed through the seams into the insert, or a few small hand stitches with clear thread through the back layers only. The goal is to keep the shirt from shifting without anything visible from the front. Pins along the seams every few inches are the classic approach — they are invisible from the front and easy to remove later.
5. Assemble the frame. Place the glazing in the frame first, then lower in the mounted shirt on its insert, then secure the frame’s backing. Confirm from the front that the shirt sits centered and the fabric does not touch the glass. If your frame has swivel tabs or clips on the back, engage them firmly — a heavy mounted shirt can shift over time if the backing is loose.
The whole job typically takes under an hour once you have the materials, and the most time-consuming part is step three: getting the fold exactly how you want it. That is time well spent. A shirt folded with care looks tailored; a shirt folded in a hurry looks stuffed.
Practical tip: photograph the shirt’s arrangement with your phone before you close up the frame. If you ever need to remount it — after a move, for instance — the photo is your blueprint.
The Traditional Cut-and-Mount Method
The traditional framing method involves cutting the shirt — usually cutting out the front panel with the design — and mounting that panel flat on a backing board like a textile artwork. Professional framers still do it this way for a reason: it produces the flattest, most poster-like result, with the design perfectly smooth and every edge controlled.
The trade-off is obvious and permanent: the shirt is cut and can never be worn again. For a worn-out concert tee that was headed for the rag bin anyway, that is no loss at all. For a signed shirt, a vintage piece, or anything irreplaceable, it is a real cost — and the no-cut method above exists precisely for those cases.
If you go this route, the process is: cut the design panel with a generous margin, mount it centered on an acid-free backing board using archival mounting methods (stainless pins, stitching, or archival adhesive — never standard tape or craft glue, which yellow and damage fabric over time), and frame it with the same depth and glazing considerations as the no-cut method. Because the panel is flat, you can sometimes use a shallower frame — but keep the air gap between fabric and glazing regardless.
Be honest with yourself about which camp your shirt falls into before you pick up the scissors. The number of people who regret cutting is much larger than the number who regret not cutting.
Protecting the Shirt for the Long Term
A t frame shirt display is a preservation project as much as a decor project. Fabric and ink degrade under the same enemies: light, moisture, and time. A few choices during framing make the difference between a display that looks great for a decade and one that fades within a couple of years.
UV protection is the big one. Sunlight — and to a lesser extent, strong indoor lighting — fades fabric dyes and printed graphics. If the display will hang anywhere near a window, or in a bright room, use UV-protective glass or acrylic. It filters out the wavelengths that do the most damage and it is the single highest-impact upgrade you can make. Even with UV glazing, though, avoid hanging the frame in direct, all-day sun; no glazing blocks everything.
Keep fabric off the glass. This came up in sizing, and it deserves repeating because it is the mistake that causes actual damage rather than just a faded look. Fabric pressed against glazing traps humidity, and trapped humidity means mildew, foxing spots, and ink transfer onto the glass. The air gap inside a proper shadow box or deep frame is functional, not decorative.
Use archival materials. Regular cardboard, standard tape, and craft glue contain acids that yellow fabric and weaken fibers over years of contact. Acid-free backing boards, stainless steel pins, and archival tapes cost only slightly more and do not quietly damage the shirt from behind. For an ordinary tee this is a nice-to-have; for a signed or vintage shirt it is essential.
Mind the environment. Do not hang a framed textile in a bathroom, above a radiator, or anywhere with big humidity swings. Stable, moderate conditions — the same ones you would want for any artwork — are what fabric likes. If the glass fogs on the inside, the location is too humid and the frame needs to move.
Lighting finishes the job. A picture light or a well-placed accent light makes the display feel like the artwork it is, and it lets you keep the room’s main lighting moderate — which, conveniently, is also better for the fabric. Just keep any light source from shining directly and hotly onto the glazing, which creates glare and heat in equal measure.
Hanging and Displaying It Well
A well-framed shirt hung badly still looks like an afterthought. A few placement decisions elevate the whole project.
Hang it at eye level — the center of the frame roughly 57 to 60 inches from the floor, which is the standard gallery height and the height at which the human eye naturally rests. In a hallway or above furniture, adjust so the frame relates to its surroundings: eight to ten inches above a console table or dresser is a comfortable gap, and the frame’s width should feel proportional to the furniture below it rather than dwarfed by it.
Use proper hanging hardware rated for the frame’s weight. A mounted t-shirt in a shadow box is heavier than an empty frame of the same size — the insert, fabric, and glazing add up. Picture wire on D-rings, or two well-anchored hooks for wider frames, keeps it level and secure. For drywall, use anchors rated above the frame’s weight; for plaster or masonry, use the appropriate fasteners rather than hoping a nail holds.
Consider the grouping. A single framed shirt makes a strong statement in a hallway or home office. Two or three — a series of concert tees, a set of jerseys — work as a gallery wall, hung with consistent spacing and aligned centers. Keep the frames in the same style and finish for a collected look; mismatched frames can work, but they need deliberate arrangement to read as intentional rather than accidental.
Lighting finishes the job. A picture light or a well-placed accent light makes the display feel like the artwork it is, and it lets you keep the room’s main lighting moderate — which, conveniently, is also better for the fabric. Just keep any light source from shining directly and hotly onto the glazing, which creates glare and heat in equal measure.
If you are refreshing a room around a new display piece, A Daily Insight360 covers home, lifestyle, and everyday ideas that pair well with a decor project like this.
FAQs
What is the best frame for a t-shirt display?
For most people, a shadow box frame with UV-protective glass is the best pick for a modern floating look, especially for jerseys.
Can I frame a t-shirt without cutting it?
Yes — the no-cut method folds the shirt over a cardboard or foam insert and secures the excess fabric on the back with pins, archival tape, or stitching. The shirt stays completely intact and the process is reversible, which makes it the right choice for signed, vintage, or sentimental shirts.
What size frame do I need for a t-shirt?
Measure the visible design area of the shirt laid flat, then add two to three inches of margin on each side for background space. Also check the frame’s interior depth — a folded shirt on an insert is typically one to two inches thick, and the fabric must not touch the glazing.
How do I keep a framed t-shirt from fading?
Use UV-protective glass or acrylic, hang the frame out of direct sunlight, and keep room lighting moderate. No glazing blocks all UV, so placement matters as much as the glass — a north-facing wall or an interior hallway will preserve colors far longer than a sun-facing window wall.
Should the shirt touch the glass in the frame?
No. Fabric touching glazing traps moisture, which can cause mildew, staining, and ink transfer. Always maintain an air gap between the shirt and the glass — this is the main reason t-shirt displays need deep frames like shadow boxes rather than standard flat frames.
How do you frame a signed t-shirt?
Use the no-cut method so the shirt stays intact, handle it by the edges to avoid smudging the signature, mount it with stainless pins or archival materials only, use UV-protective glazing, and hang it away from direct sunlight. For valuable autographs, consider having a professional framer do the mounting.
Conclusion
A t frame shirt display is one of those projects with an outsized payoff: an hour of careful work turns a shirt you were not wearing into a piece of your home that actually means something. Choose a deep frame that fits the folded shirt with room to spare, mount it with the no-cut method unless you are certain the shirt is expendable, protect it with UV glazing and an air gap, and hang it where you will actually see it. Do those things and the shirt on your wall will outlast the memory of the drawer it used to live in.
Read Also: U.S. Cellular Login (2026 Guide): Sign In, Pay Bills & the T-Mobile Move