When I first moved into my current house three years ago, I noticed something odd about the water coming from my kitchen tap. It had a slight yellowish tint and occasionally smelled like chlorine, which honestly made me uncomfortable about drinking it directly. My wife would always insist on buying bottled water, which meant we spent around fifty dollars every week just on drinking water. That’s roughly two thousand dollars a year that could have gone toward something more useful. I started researching water filtration solutions and quickly discovered that an under sink water filter might be exactly what we needed. Fast forward to today, and I can confidently say that installing an under sink filtration system was one of the best home improvement decisions I made. Not only does our tap water taste significantly better, but we’ve also saved thousands of dollars and reduced our plastic waste considerably.
What Exactly Is an Under Sink Water Filter?
An under sink water filter is a compact filtration system that gets installed directly beneath your kitchen sink. Instead of filtering all the water entering your home like a whole house system would, it only filters the water that comes out of a dedicated faucet. This system uses a combination of different filter media and cartridges to remove various contaminants from your tap water before it reaches your glass.
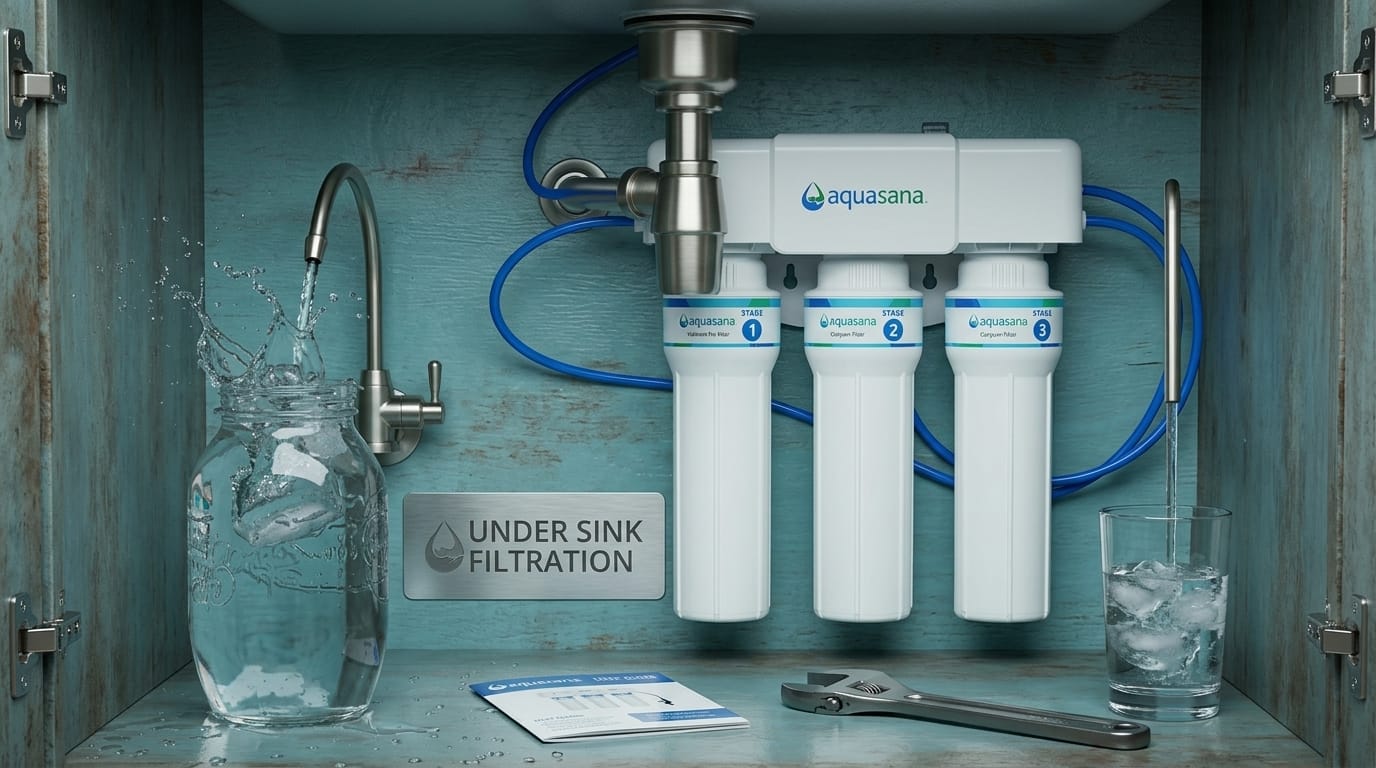
The basic setup typically includes a filter housing unit that contains multiple filter stages, tubing connections that tap into your water supply line, and a separate drinking water faucet that gets installed on your sink countertop. Some systems are quite simple with just one or two filter stages, while others are more complex with three, four, or even five different filtration stages. The water essentially gets pressurized through these filters before it comes out of the special faucet, which means you don’t need electricity or a pump to make most of these systems work. This is one of the reasons I personally love under sink filters because they’re incredibly reliable and don’t depend on having power available.
How Do Under Sink Filtration Systems Work?
Understanding how these systems work really helped me appreciate why they’re so effective. When you open the dedicated faucet on your sink, water flows from your main water line into the filtration system. This is where the magic happens. The water gets pushed through several different types of filter media, each one responsible for removing specific contaminants.
Most under sink systems use a combination approach. The first stage usually contains sediment filters that trap particles like sand, rust, and debris. Think of this like a net that catches visible particles that make your water cloudy or discolored. The second stage typically uses activated carbon, which is incredibly porous and works wonders at removing chlorine, some pesticides, and chemicals that affect taste and smell. I noticed this immediately after my installation. The chlorine smell that bothered me so much literally disappeared within days of using the filtered water.
Many systems include a third stage with another type of carbon filter or a specialty media designed for specific contaminants. Some advanced systems even include reverse osmosis membranes that can remove up to ninety nine percent of dissolved solids, including salt, minerals, and various chemicals. These RO systems create something called rejection water, which basically means some water gets used for the filtration process and doesn’t come out your faucet. This is totally normal and actually shows the system is working properly.
The clever thing about under sink systems is that they work on water pressure alone. Your home’s water pressure naturally pushes the water through all these filter stages without needing any electricity. This means they work during power outages, require no maintenance beyond filter changes, and are incredibly quiet since there’s no motor running.
Main Benefits of Installing Under Sink Filters
I’ve experienced so many benefits from having an under sink filter that I genuinely recommend them to everyone I know who mentions concerns about their water quality. Let me walk you through the real advantages.
First, there’s the taste and smell improvement. This is the most immediately noticeable benefit. Water that previously had a chlorine taste now tastes fresh and clean. My kids actually started drinking more water instead of always asking for juice boxes once the taste improved. This might sound small, but better hydration for your family is genuinely important.
Second is the cost savings, which in my case has been substantial. Buying bottled water regularly adds up incredibly fast. We were spending about fifty dollars weekly on bottled water, which equals twenty six hundred dollars annually. Our under sink filter system cost about three hundred dollars to purchase and install, and replacement filters run about sixty dollars each. We replace filters about every six to nine months depending on usage and water quality, so our annual cost is around one hundred fifty dollars. That’s a seventeen hundred dollar annual savings, and we get fresh filtered water directly from our tap whenever we need it.
Third is the environmental impact. Not buying bottled water means we’re not contributing to plastic waste that ends up in landfills or oceans. My wife actually pointed this out to me, and honestly, it made me feel better about the whole thing. We were throwing away one or two cases of water bottles weekly, and that’s just wasteful.
Fourth is convenience. Having filtered water available right at your sink means no more storing cases of water bottles in your pantry or garage. You simply turn on your dedicated faucet and fill your glass. It’s as simple as regular tap water but cleaner.
Fifth is contaminant removal. Depending on which type of under sink system you choose, you can remove chlorine, sediment, various chemicals, heavy metals, and potentially harmful microorganisms. This gives genuine peace of mind knowing that your drinking water is actually clean.
Types of Under Sink Filtration Systems
Not all under sink systems are created equal, and I learned this through quite a bit of research before buying mine. There are basically three main types to understand.
The first type is basic carbon filtration. These systems have one or two filter cartridges that mainly remove chlorine and improve taste and smell. They’re the most affordable option, usually costing between one hundred and two hundred dollars. They work decently if your main concern is taste, but they won’t remove sediment or dissolved minerals.
The second type is multi stage filtration. These typically have three, four, or even five different filter stages. My system falls into this category. You get sediment removal, carbon filtration, and sometimes a special media stage designed for specific contaminants. These cost between two hundred and five hundred dollars and offer much better overall water quality improvement.
The third type is reverse osmosis systems. These are more sophisticated and actually remove almost everything from water, including beneficial minerals, which is why many people install a remineralization stage afterward. They’re more expensive at four hundred to one thousand dollars, need a bit more space, and produce some rejection water. However, they offer the most thorough filtration available. If you’re really concerned about water quality or you have specific contaminants in your water, RO systems are worth the investment.
Step-by-Step Installation Guide
I’m not going to lie, installing my under sink filter initially intimidated me. However, I quickly realized it’s actually very doable even if you’re not particularly handy. Let me walk you through what the process actually involves.
First, you need to gather your materials. Most systems come with everything you need including the filter housing, cartridges, tubing, fittings, and usually installation instructions. You’ll also want to have an adjustable wrench or two, a flathead screwdriver, some Teflon tape for threaded connections, and a bucket under your sink to catch any water spillage during the process.
Second, you need to turn off your water supply. Look under your sink for the shut off valves on your cold water line. If you can’t find them, you might need to go to your main water shut off. This step is absolutely crucial because you don’t want water spraying everywhere when you start disconnecting things.
Third, you need to prepare the installation location. Under sink filters don’t take up much space, but you need enough room to work. Remove anything stored under your sink and find a good spot where you can mount the filter housing. Most people attach it directly to the underside of the cabinet.
Fourth, you need to tap into the cold water line. This involves attaching a fitting to your existing water supply line. There are different methods depending on your setup, but most modern systems use a simple compression fitting that doesn’t require cutting or soldering. This is genuinely easier than it sounds. The fitting basically clamps onto your existing line and creates a connection point.
Fifth, you connect tubing from the tapping point to your filter housing. This is straightforward plumbing that mostly involves pushing tubing onto fittings and securing them. The tubing connects the main water supply to your filter system.
Sixth, you need to install your new drinking water faucet. This typically involves drilling a small hole in your sink or counter and installing the faucet through it. If you’re uncomfortable drilling into your sink, many kitchen fitters can do this for you for a small fee.
Seventh, you connect more tubing from your filter housing to the new faucet. This is where your filtered water comes out.
Finally, you flush the system before using it. Turn your water back on and run water through the new faucet for several minutes to flush out any carbon dust or manufacturing debris from the filter cartridges. The water might look slightly dark or cloudy at first, which is completely normal.
The whole process usually takes between two and four hours depending on your comfort level and your specific plumbing setup. I watched a video tutorial before starting, which gave me confidence that I could actually do it myself.
Maintenance and Filter Replacement
One thing nobody really talks about is that your filters need replacing regularly, and this is actually really important for system performance and safety. I learned this the hard way when I started noticing my filtered water tasted slightly off around month eight, and realized I hadn’t replaced the filters since installation.
Most basic carbon filters need replacement every three to six months depending on how much water you filter daily. If you have a family of four all using filtered water for drinking and cooking, you’ll probably need more frequent replacements. My system came with replacement filter packs that I buy as needed, which cost about sixty dollars for a set of three cartridges.
Replacing filters is genuinely simple. You basically turn off the water, unscrew the filter housing, pull out the old cartridges, rinse everything, insert new cartridges, screw it back together, and run water through it again. Most people take about fifteen minutes for this task. There are also affordable replacement cartridge subscription services that automatically deliver new filters right before you need them, which I’ve been considering lately.
You should also keep an eye on water pressure. If your water pressure decreases significantly, it usually means your filters are becoming saturated with contaminants. Some systems have filter change indicators that turn red or show some kind of alert, which makes this really convenient.
Another maintenance tip is occasionally checking for leaks, especially around your connections. When I installed my system, I noticed a tiny drip from one connection point after about a month. I tightened it slightly and the drip stopped immediately. These things can happen as parts settle into place.
Cost Analysis: Is It Worth the Investment?
Let me give you some realistic numbers based on my personal experience. When you’re considering whether to invest in an under sink filter, the financial math matters.
Initial purchase and installation costs typically run between three hundred and one thousand dollars depending on which system you choose. Basic systems are cheaper, and reverse osmosis systems are more expensive. I spent about three hundred twenty dollars total for my multi stage system and installation.
Annual filter replacement costs depend on your system but usually total between one hundred and two hundred dollars for most households. My family spends about one hundred fifty dollars yearly.
Compare this to bottled water. We were spending about twenty six hundred dollars annually on bottled water. Switching to under sink filtration reduced this to basically zero except for occasional bottles when we’re out somewhere.
Over five years, we’ve spent about one thousand dollars total on the system and filters, saving us more than twelve thousand dollars on bottled water. That’s a return on investment that happens within about two months.
From an environmental perspective, we’ve eliminated about one hundred and thirty pounds of plastic waste annually, which honestly feels really good.
The peace of mind from knowing your family is drinking clean water has value too. In my opinion, that’s worth the money all by itself.
Common Problems and Solutions
I’ve had a few issues with my system over the years, and I want to prepare you for what might happen so you’re not caught off guard.
The first common issue is reduced water flow. If your water pressure drops significantly, it usually means your filters are overdue for replacement. Just change them and the pressure typically returns to normal. This happened to me around month six, and I realized I’d been using the system heavily with summer gatherings and hadn’t replaced the filters yet.
The second issue is leaking connections. This happened with one of my fittings, and a simple tightening with a wrench fixed it. If tightening doesn’t work, you might need to remove the fitting, rewrap the threads with Teflon tape, and reconnect it.
The third issue is strange taste or smell, which usually means your filters need replacement. Carbon filters degrade over time, and once they’re saturated, they stop removing contaminants effectively. This is your signal that replacement time has arrived.
The fourth issue is filter cartridges that don’t fit properly. Double check that you’re ordering the correct replacement cartridges for your specific system. Different brands use different cartridge sizes and connection types.
The fifth issue is sediment building up in the bottom of your filter housing. Some systems need occasional flushing where you backflush water through them to clean out accumulated sediment. Check your instruction manual to see if this applies to your system.
The sixth issue is leaking filter housings. If your housing is cracked or damaged, it usually needs replacement rather than repair. This hasn’t happened to me personally, but I’ve read about it online.
Frequently Asked Questions
People always ask me similar questions about my under sink filter, so I want to address the most common ones directly.
How long do under sink filters actually last? Replacement filters usually last between three and nine months depending on your water quality, usage, and specific filter type. High quality water might allow longer intervals between replacements, while poor quality water might need filters changed more frequently.
Can I install this myself or do I need a professional? Most people can definitely install these themselves if they’re comfortable doing basic plumbing. If you’re nervous, hiring a professional plumber costs between one hundred fifty and three hundred dollars but ensures proper installation.
What exactly gets removed by these filters? This depends entirely on the type of system. Basic systems remove chlorine and improve taste. Multi stage systems remove sediment, chlorine, and various chemicals. RO systems remove almost everything including dissolved minerals.
Do I need a special permit to install one? In most places, no. Under sink filters are pretty straightforward installations that don’t typically require permits. Check with your local building department if you’re concerned.
Will filtered water still contain necessary minerals? Most systems do remove some minerals. If you want to maintain mineral content, look for systems with remineralization stages, or your body gets minerals from food anyway.
Can I use the same faucet for filtered and unfiltered water? No, the dedicated faucet only dispenses filtered water. You still have your regular tap faucet for unfiltered water if needed.
What’s the difference between under sink and whole house filters? Under sink filters only filter water from one tap, while whole house systems filter all water entering your home. Under sink is cheaper and doesn’t require professional installation.
Conclusion
After using an under sink water filtration system for three years now, I genuinely cannot imagine going back to drinking bottled water or unfiltered tap water. The combination of better water quality, significant cost savings, reduced environmental impact, and improved convenience makes this one of the best home investments I’ve made. Whether you’re concerned about water taste, specific contaminants in your area, or simply want cleaner drinking water, an under sink filtration system offers a practical, affordable solution that actually works.
Start by testing your water quality to understand what contaminants you’re dealing with. Then choose a system that addresses your specific concerns. Installation is usually straightforward, and maintenance is minimal. Within a few months, the system will pay for itself through the bottled water you’re no longer buying. Give it a try, and I’m willing to bet you’ll love the results as much as my family does.
FAQ Section
Q: How much water does an under sink filter waste?
A: Basic carbon and multi stage systems waste minimal water. Reverse osmosis systems produce rejection water at roughly a 3:1 ratio, meaning three gallons of water produce one gallon of filtered water.
Q: Can I take my under sink filter if I move?
A: Yes, most systems can be disconnected and reinstalled in your new home, though you might need new tubing and some fittings depending on your plumbing setup.
Q: Are store bought filters better than under sink systems?
A: Pitcher filters are more portable but work more slowly and need very frequent replacement. Under sink systems provide continuous filtered water and cost less over time.
Q: Do these systems remove beneficial minerals from water?
A: Carbon filters don’t remove minerals. RO systems do remove most minerals, which is why some people add remineralization stages.
Q: How do I know when my filter needs replacement?
A: You’ll notice reduced water pressure or changes in taste. Many filters also have replacement indicators. Generally, replace every three to nine months.
Q: What happens if I don’t replace my filters?
A: Filters become saturated and stop removing contaminants effectively. Your water quality will match unfiltered tap water, defeating the purpose of the system.